Introduction
CloudAMQP comes with the built-in RabbitMQ management plugin for your basic admin tasks like checking if a queue exists. For more advanced use cases like managing dead letter queues, republishing messages, or advanced routing, you really want to use a tool like RabbitGUI. This short article is simply an introduction to demonstrate how easy it is to use RabbitGUI with your CloudAMQP instance.
Credentials
Log into your CloudAMQP account and go to the "Overview" tab. Under the "AMQP details" section you will find all the information you need to log into your RabbitMQ instance.
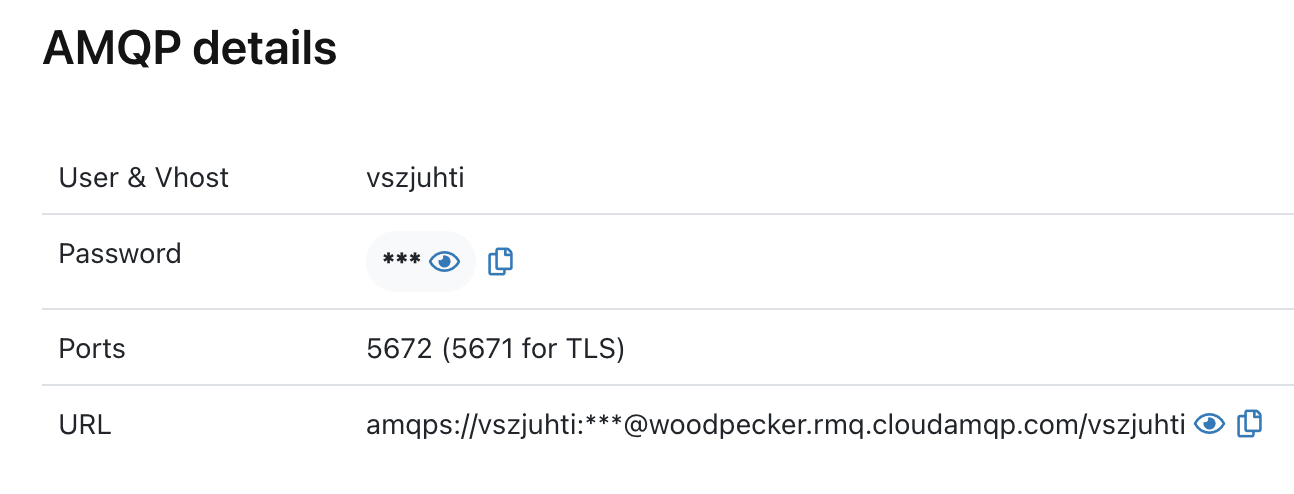
In our case the host is https://woodpecker.rmq.cloudamqp.com and the user is vszjuhti. Notice that we simply added https:// in front of the host section of the URL.
Creating a new connexion in RabbitGUI
Open up RabbitGUI and create a new connexion. Simply paste the credentials you got from the previous step and you should be good to go.
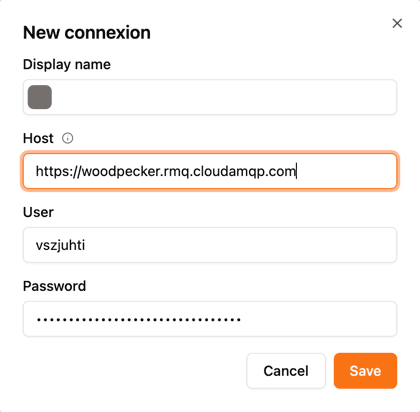
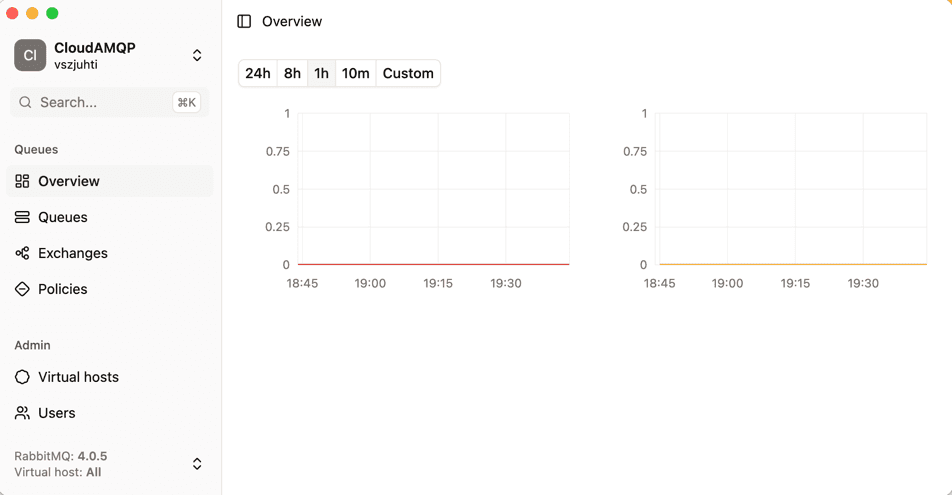
Hit save, you should now have access to your instance right from RabbitGUI. From here you can manage your queues, routing, publish messages, and much more.
Going further with RabbitGUI
To take full advantage of RabbitGUI capability we have compiled down a list of topics you might want to dig into. Learn more about publishing messages to RabbitMQ using the advanced JSON editor and routing capabilities. You may also want to have a look at exploring routing with RabbitGUI routing explorer for RabbitMQ. And of course make sure to read our guide on managing RabbitMQ dead-letter queues directly from RabbitGUI, this is probably going to save you lot of headache.